Saturday, 4 April 2015

68k Part 1 - Easy now, raster lines and mouse buttons

Starting really simple now, lets change the colour of the raster lines and check the mouse buttons...

Changing the default colours on the Amiga

Yes there will be a heavy influence from the ScoopexUs 'Amiga Hardware Programming' tutorials on YouTube for the next few blog posts for sure. How can there not be? they are just so good!

I'm only learning, just a 68k noob!

I'm just trying to mess around with my own sections of code, for my own sanity, checking that I do sort of understand and hopefully will stick in my head for a while!  I will try to comment my code the best I can so that it explains itself.  Please PLEASE suggest better ways to do stuff, my samples sure wont be perfect.

My first snippet

Create a new file in Asm-One and copy paste the following code (or download source here).

This simple sample changes the default background and foreground colours, if the right mouse button is pressed down, it will change the colours whilst it's being pressed.  If the left mouse button is pressed the program is ended.

loop:
 
 btst #10, $dff016 ; test RIGHT mouse click
 bne default

; colours when right click is pressed
 
 move.w #$0f0, $dff180 ; moving colour in to background colour
 move.w #$0ff, $dff182 ; moving colour in to foreground colour

 bra  checkExit
 
default:

; default colours

 move.w #$f00, $dff180 ; moving colour in to background colour
 move.w #$ff0, $dff182 ; moving colour in to foreground colour 
 
checkExit:

 btst #6, $bfe001  ; test LEFT mouse click
 bne loop

 rts 

So I'm updating the colours every frame, I probably only need to do it at the start of the first raster line for each frame, but just as a sample I think it's ok.

Comment here or get involved on twitter: @rich_lloyd

Back with Amiga 68k Assembler, with ASM-ONE! C'MON!

OK so I started learning 68k assembler a while back now (2013!!) and it's tough, really tough.  I think it's more a case of just needing the time and focus to concentrate so that it absorbs in my brain.  Life and work gets in the way!!

I've been coding higher level languages for many many years now so it's not like I'm starting from scratch.  The hardest part for me is understanding the hardware, and how all the different code integrates to build the bigger picture.

Long story short - I've had a break away from the assembler world, and now I'm back and determined to get SOMEWHERE in 68k for the Amiga!  C'MON!

Comment here or get involved on twitter: @rich_lloyd

New goals!

Here's a list of things I would LOVE to achieve, once I've got a small library of techniques, hopefully I can start working towards the bigger goal of creating an Intro / Demo / Game.

  • Understanding  68k basics.  Moving stuff around in memory and program flow
  • Get a grip of the Copper, custom backgrounds
  • Draw a sprite!
  • Move a sprite!!
  • Mouse Input
  • Keyboard Input
  • Joystick Input
  • Play a music track / audio
  • Display Text
  • Create a simple Intro / Demo / Game
The ultimate goal would be to have made something awesome that fits on a floppy disc and runs on a regular Amiga machine.  I'll be happy with it running on the Amiga 1200, but if I can get it working on the Amiga 500 and upwards that really would be an achievement.

My new setup - AsmOne, lets get coding!

To achieve my goals, coding directly on my Amiga 1200 through my whole learning journey will be well... a very slow experience.  Lets get real, I'll be coding on my Windows laptops, then transferring the files to my Amiga now and then to check it works on real hardware.

My Windows setup with WinUAE, AsmOne and Notepad++

Depending on the time of day, I'll be switching between 2 laptops (Windows 7 and Windows 8), but both will have identical set-ups.

Naturally I use WinUAE which is an amazing Amiga Emulator, you can download it here:

WinUAE Downloadhttp://www.winuae.net/frames/download.html

I've created a folder on my machine and set up as a hard drive (DH0:) when I launch WinUAE.  This means I can view files in BOTH the emulated Amiga and in Windows.  Makes it so easy to copy files about, especially when looking through examples online, I can just drop in to that folder and my emulated Amiga can see them straight away.  Happy days!

The assembler I will now be using to learn 68k will be AsmOne, mainly because there are plenty of examples out there that use it, and also off the back of Photon's truly amazing tutorials on YouTube which I have linked before, but will link again further down.

AsmOne Downloadhttp://www.theflamearrows.info/documents/ftp.html

Now I 'could' use the AsmOne text editor through the Amiga emulator, but in all honesty, it's slow.  Here's a better idea, as my files can be seen in Windows, I can use a modern text editor!!  Save the changes, and the Amiga will get updated.

For now I use Notepad++ , you can even import the 68k Assembly language definition for syntax highlighting etc...

Notepad++ Download here:
http://notepad-plus-plus.org/

Get the language definition here:
http://notepad-plus.sourceforge.net/commun/userDefinedLang/68K_Assembly.xml

So the last bit of setup I have, is that the folder I have on my Windows drive is actually part of my OneDrive (it could easily be a DropBox or GoogleDrive, etc... ).  As I work on multiple machines, my files instantly get synchronised so it makes it so much easier for me to pick up where I left when I get a spare moment.

68k references

Sure thing Google is your friend here, as well as the usual Amiga websites.  I have found it harder than I thought to hunt down things when I've had issues, so I'm just sharing some links here that might help out:
Make sure you subscribe to Photon's YouTube channel, includes excellent tutorials for Amiga Hardware Programming as well as other great Amgia stuff like demos.

ScoopexUs YouTube channel here - https://www.youtube.com/user/ScoopexUs

If you find a goldmine of reference then please let me know!

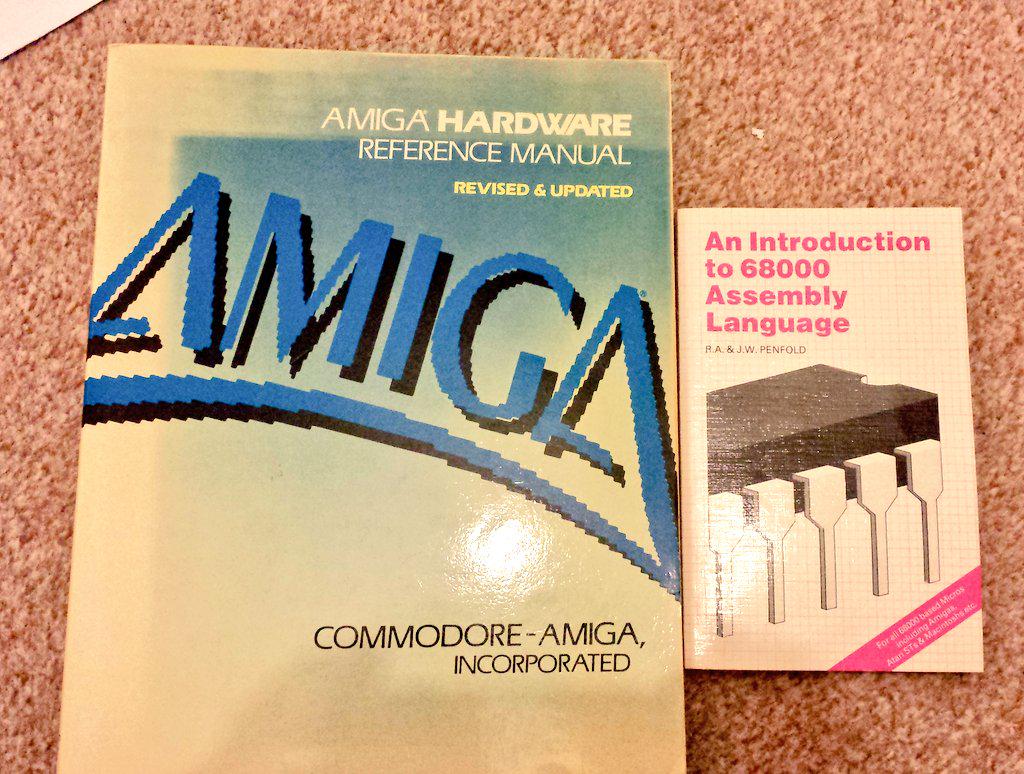
Here's a couple of books I find REALLY helpful when trying to get my head in the zone!


Comment here or get involved on twitter: @rich_lloyd